To tune a drum, set the head to the correct pitch range for that size of drum, then match that pitch at every tension rod around the drum. A $10 drum key gets you there by ear in under 10 minutes; a drum dial or digital tuner does it by number instead of feel.
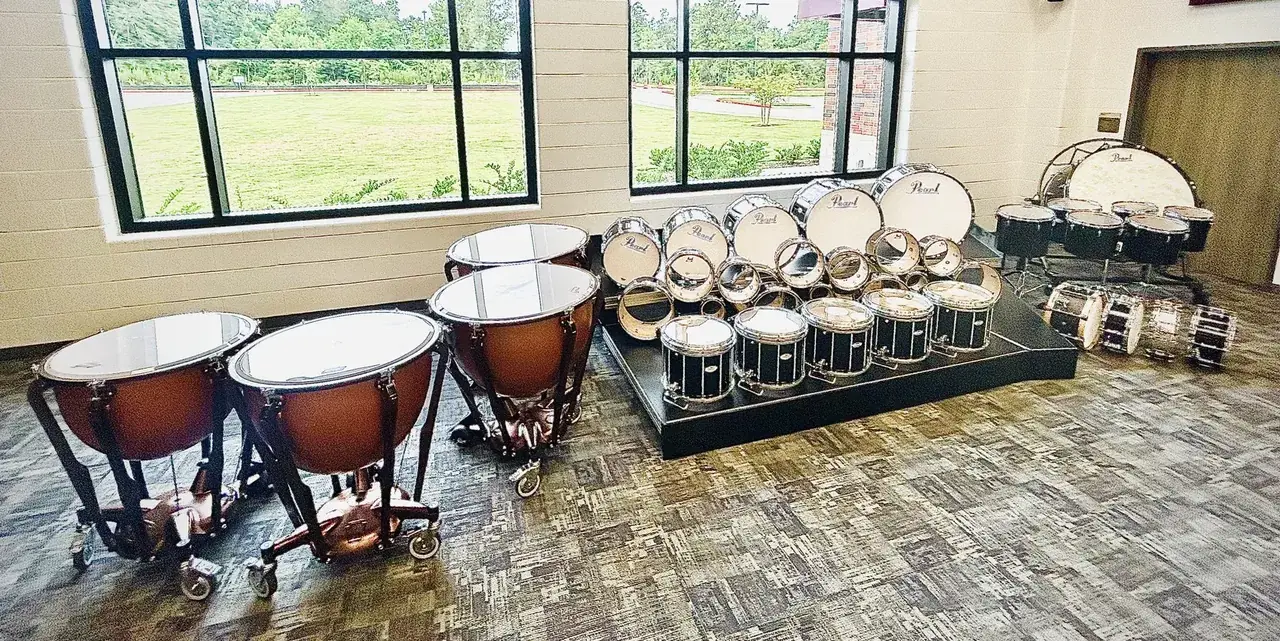
We can get you Remo, Evans, or any other head brand you need, and every head we put on gets tuned before we leave. That's across more than 500 school and band programs since 2015.
A drum can have anywhere from 6 to 12 tension rods depending on its size, and what keeps most directors from touching them isn't ignorance. It's that nobody's ever demonstrated the head tuning process for them, or it's been years since they last watched someone do it. A $10 drum key ends up sitting in a drawer instead of being used to make their drums sound amazing.
Drum heads gradually lose their pitch over time, and a player or conductor can get used to it without ever noticing it's dropping. Professional players keep their drums sounding amazing by tuning them daily, but we know that's not realistic for most band programs, so once a month is the real recommendation. Wait much longer than that, and the out-of-tune sound starts to feel normal instead of wrong.
Before working on percussion equipment became my full-time job, I spent four years as a percussion director. I know how little time there is in the day for tuning drums, but if you can set aside one or two days a month for half an hour, you'll slowly build the confidence to tune a drum quickly and keep your drums sounding great.
How to Tune Any Drum, Start to Finish
People have been doing this exact job with a drum key since 1883, the year Emile Boulanger patented the tension rod, per his original US patent filing, replacing the old rope-and-leather-knot system drummers had tuned with before then. Rope tuning meant hauling on a cord and hoping you could get the head to the correct pitch. Even though you have it easier than every drummer before 1883, you're still allowed to be a little intimidated by the process, but keep practicing it, and you'll be an all-star before you know it.
| Before 1883 | After 1883 |
|---|---|
| Rope and sliding leather knots | A tension rod at every lug |
| Tightened by hauling and hoping | Tightened by a quarter turn at a time |
| No way to isolate one lug | Every lug adjusts on its own |
Here's the process, and it's the same for a concert snare, a marching bass drum, or a full drum set. Steps 1 and 2 are for brand-new heads only. Already seated? Skip to step 3:
- Seat the head (new heads only). Place the head on the drum, making sure it fits evenly around the bearing edge, then place the hoop on top of it. Finger-tighten every tension rod until it touches the hoop of the drum ever so slightly, then press the center of the head firmly with your palm, similar to giving CPR to the drum, but don't press too hard. If you hear a crackling sound, don't worry, that's just the glue on the head breaking up as it settles into place. There's no need to do this seating process every time you go to tune. This only applies the first time you install the head.
- Snug down the tension rods with your fingers (new heads only). Grab one tension rod with your right hand, and then grab the tension rod directly across from it with your left hand. Finger-tighten both tension rods at the same time until they are snug. Then shift both hands clockwise to the next tension rod and repeat the process. Using this method prevents the hoop from being pulled too far in one direction and possibly warping it over time. Once you've gone all the way around the drum once, repeat the process a second time. The goal is to have all of the tension rods at about the same tension.
| Step | Brand-new head | Already seated |
|---|---|---|
| 1. Seat the head | Do this | Skip it |
| 2. Snug down the rods | Do this | Skip it |
| 3. Set the pitch range | Do this | Start here |
| 4. Star pattern | Do this | Do this |
- Set the head to its pitch range. This is the actual tuning: bring the whole head up into its characteristic range for your instrument. The pitch charts further down cover exact ranges for a drum kit, concert percussion, and marching drums.
- Tune in a star, never a circle. Tuning in a star pattern allows the head and hoop to stay in position as you tighten the tension rods. If you go in a circular pattern, you run the risk of pulling the head and hoop to one side, which can warp the hoop over time.
Use the diagram below if you have a 6, 8, 10, or 12-lug drum. This process works the same as the finger-tightening method described above in step 2:
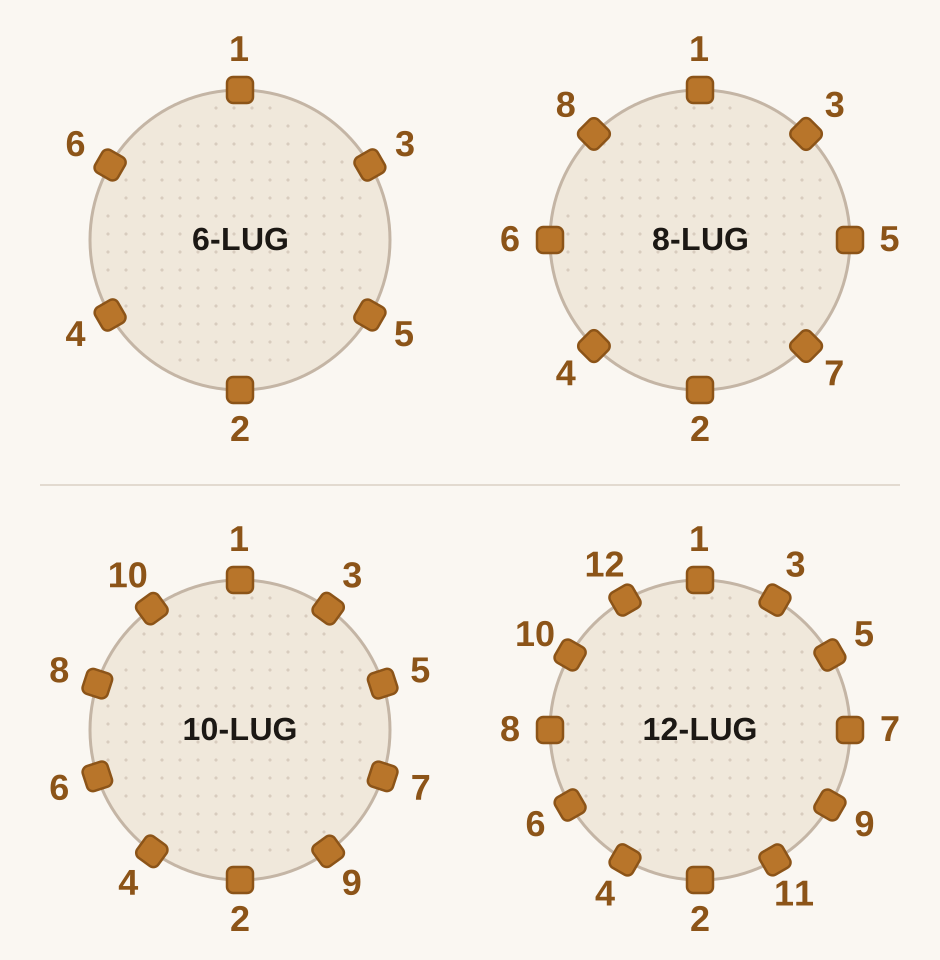
| Lug count | Common on |
|---|---|
| 6 | Rack toms |
| 8 | Floor toms, student snares |
| 10 | Concert and marching snares |
| 12 | Concert bass drums |
Bass drums follow the same math but carry more lugs: a drum-set kick typically runs 8 to 10 depending on size, a concert bass drum closer to 10 to 12. The 12-lug diagram above has you covered on the higher end of that range.
- Using quarter turns on the tension rods. The goal is to bring all of the tension rods up together to your final pitch. Avoid cranking down one tension rod before moving on to the next; tightening one tension rod too much makes the head sit uneven on the shell, and it can warp the hoop.
- Find the highest pitch. It's much easier to bring a lower pitch up to match a higher one than the reverse. At each tension rod, tap the head an inch in from the hoop and listen for the pitch. Do this all the way around, and label whichever tension rod reads the highest.
- Final tuning: clear the head. "Clearing" a drum head means matching each tension rod to the same pitch. To do this, find the tension rod with the highest pitch and bring the rest up to match it. One quick note: always finish on a tightening motion, since backing off past your target and coming back up keeps the tension rod seated in place.
Tuning Batter vs. Resonant Drumheads
In terms of building your sound, the head is doing almost all of the work. Sound engineers who spend entire careers listening to drums for a living put a real number on it: the head accounts for about 80 percent of a drum's actual sound, ahead of the shell, the hardware, or the room around the drum. Tune the head right and a $200 student snare can sound like it's worth more. Tune it wrong and a $2,000 one won't save you.
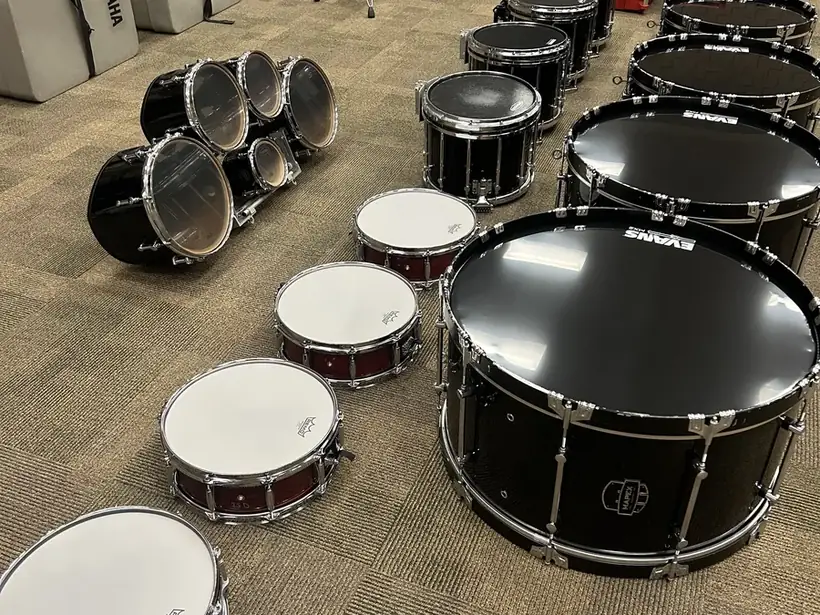
A batter head is the one you hit. A resonant head is the one you don't. It would make everyone's lives easier if every batter head and resonant head were tuned to the same pitch, but that's unfortunately not the case: drums vary in size, and smaller drums use higher pitches while bigger drums use lower ones.
| Drum | Resonant vs. batter |
|---|---|
| Drum set toms | Can be matching pitch for more resonance, slightly under for a drop in pitch, or slightly higher for a raise in pitch, relative to the batter head. |
| Concert snare | About a major seventh higher, the same general direction as a kit's convention (also a fourth, a fifth, or a major seventh above the batter head). |
| Concert toms | Batter tuned a bit higher than the resonant, so the pitch has a controlled "fall" right after you strike it. |
| Concert bass drum | The same pitch or a little higher. Matching pitch will give you more resonance. Making the resonant side head a little higher will cut down on the resonance. |
Here's the basic approach to tuning heads: the batter head should feel good to play on, and the resonant head is where most of your adjustments happen when you're crafting the sound. Remember, this is truly an art form, and it takes time and patience to learn, but I believe in you, and everyone at Bono Percussion is rooting for you!
Speaking of Bono Percussion, when we replace a head, we don't hand it back loose and wish the director luck. We leave it dialed in, whether it's one drum head replacement or a whole drumline's worth.
Tuning by Number Instead of by Ear
A drum key gets you tuned by ear; a dial tuner gets you tuned by number. In the world of drums, there are two main tools that drummers use to help them tune: one measures the pressure of the head, and the other measures the frequency of the note being played.
| Tool | Reads in | Price | Best for |
|---|---|---|---|
| Drum key + ear | Feel | $10 | A single drum, tuned on its own |
| DrumDial | 0-100 scale | $50-70 | Matching every lug on one drum quickly |
| Tune-Bot | Musical note / Hz | $70-90 | Matching several drums to each other by an actual number |
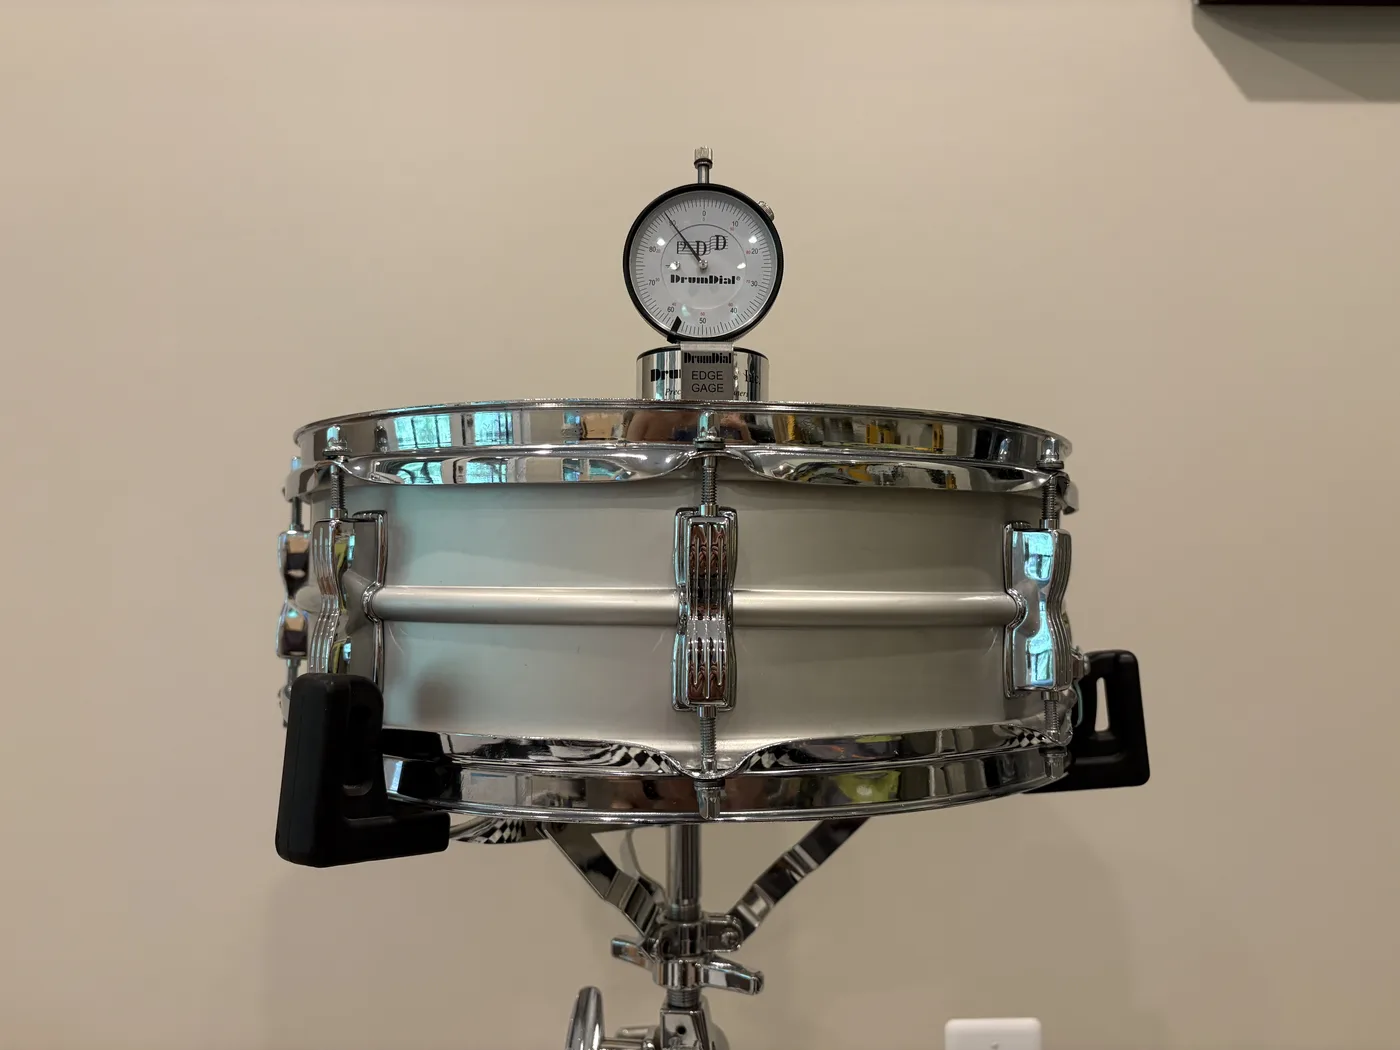
A DrumDial is an analog pressure gauge that uses a needle to measure the pressure of the head, shown as a number on its 0-100 scale. The manufacturer's own numbers vary by drum: around 75 on a drum set tom's batter head and 74 on the resonant, 82 on a snare's resonant and 85 on its batter, and 70 to 72 for a bass drum. Snares often run tighter than that in practice: the 14" x 5" drum set snare pictured below reads 90 on the batter head, above the manufacturer's own snare number, which just comes down to personal taste in how tight a kit snare gets tuned. Whatever number you land on for your own drum, match every lug to it.
The Tune-Bot works differently: it reads the actual frequency of the pitch produced when you strike the head, giving you a musical note and Hz reading instead of a gauge number. Set the Tune-Bot to the frequency of your highest tension rod first, then go around the drum and adjust every other rod until you're within 3 to 5 Hz of your target, finishing each one on a tightening motion. When you move to a different drum, just reset the target number.
Remember, these are tools: they can get you a great-sounding drum, but if you want to take it that extra step, do an ultra-fine tuning with your ear and a drum key afterward. The best part about the DrumDial and Tune-Bot is that once you land on a sound you love, you can write down the number and get back to that sound next time instead of hunting for it by ear all over again.
Tuning Concert Drums
The star-pattern process above is identical for concert percussion. What changes is each drum's target pitch. Here's the breakdown by instrument:
Concert Toms
Concert toms vary in size, which means that they all get tuned to different pitches. Some concert toms are single-headed, with just a batter head and no resonant side at all; others come with both a batter and a resonant head, similar to a drum set tom.
Concert toms are the one place tuning gets musical on purpose. Most players and techs aim for an even interval between the drums: a pitch gap of roughly a third between neighboring toms is the most common setup, so a run across the set sounds like a phrase instead of unrelated thuds. Sizes typically run 10 inches to 16 inches, tuned relative to the pitch center of the band.
Concert Snare Drum
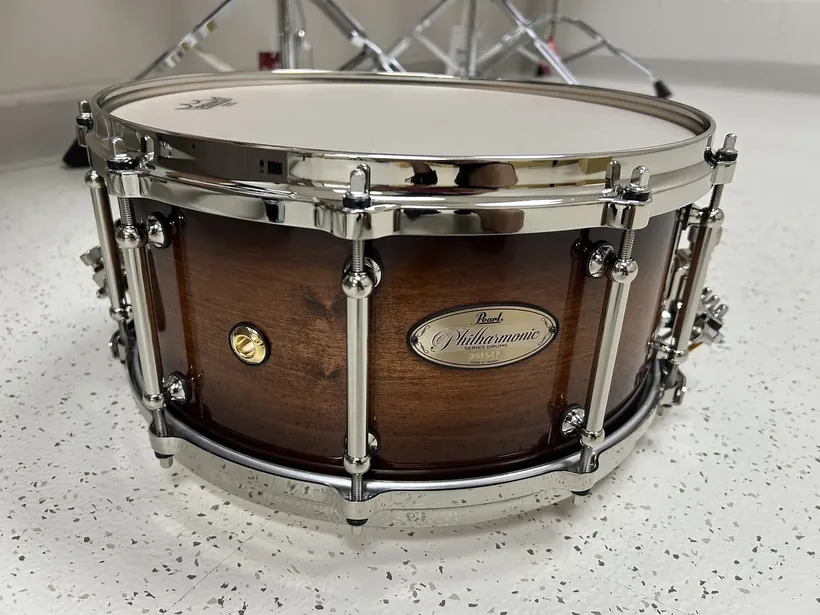
A 14" x 5" concert snare, the most common size in a school program, tunes to G#-B on the batter head, with the resonant tuned about a major seventh higher, roughly G5 to A#5. See the Additional Notes on Snare Drums section below for other sizes, snares-off tuning tips, and the wire-buzz fix.
Concert Bass Drum
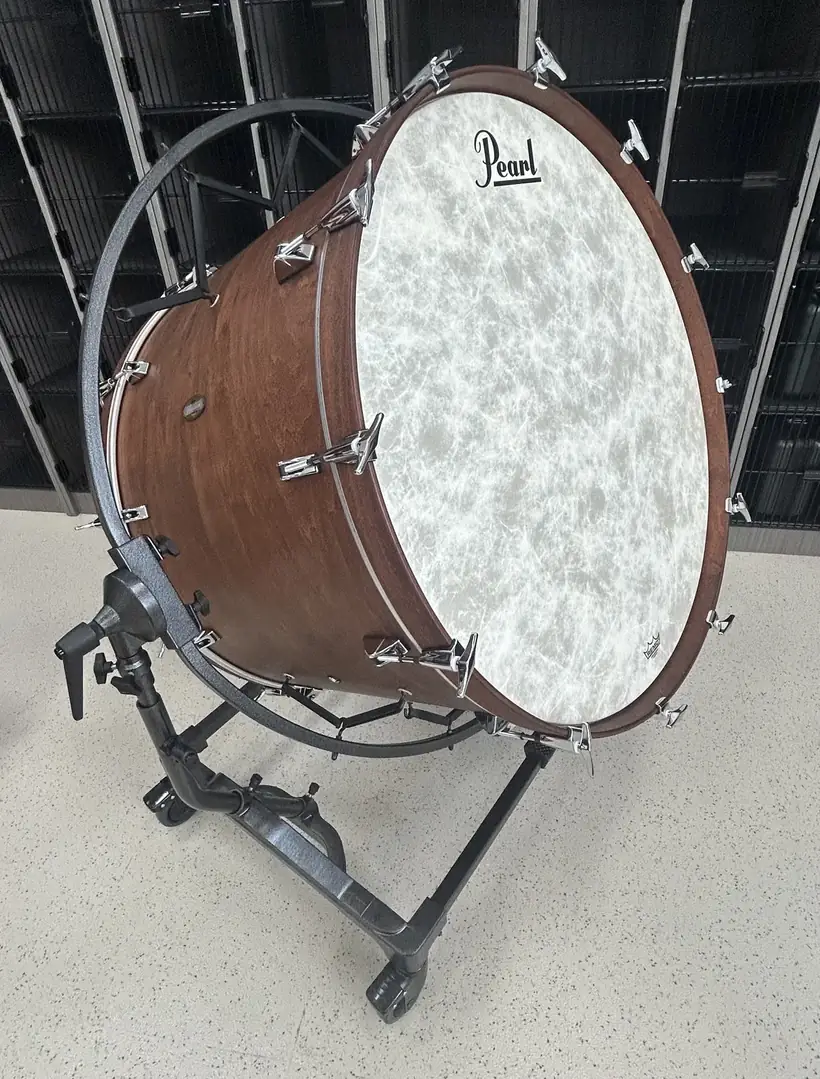
A concert bass drum, typically 36 inches, has no fixed note: it's tuned by ear to the lowest clear tone, with the resonant at the same pitch or a little higher.
A concert bass drum genuinely doesn't have one right answer here. Even the manufacturer's guides call it a matter of taste, not a formula, but the general approach is to tune the batter head to the lowest clear tone and then tune the resonant head to the same pitch or slightly higher.
Timpani aren't on this chart on purpose. A pedal changes the pitch of the head, different enough to get its own guide. Check out our timpani care guide or the timpani repair page if that's what brought you here.
Additional Notes on Snare Drums
Snare depth changes the feel more than most people expect. A 14" x 5" runs bright and sensitive, closer to a concert or jazz sound. Step down to a 14" x 6" or 14" x 6.5", and the extra shell depth adds more low end and projection, which is why deeper shells are common on field and marching snares built to cut through outdoors.
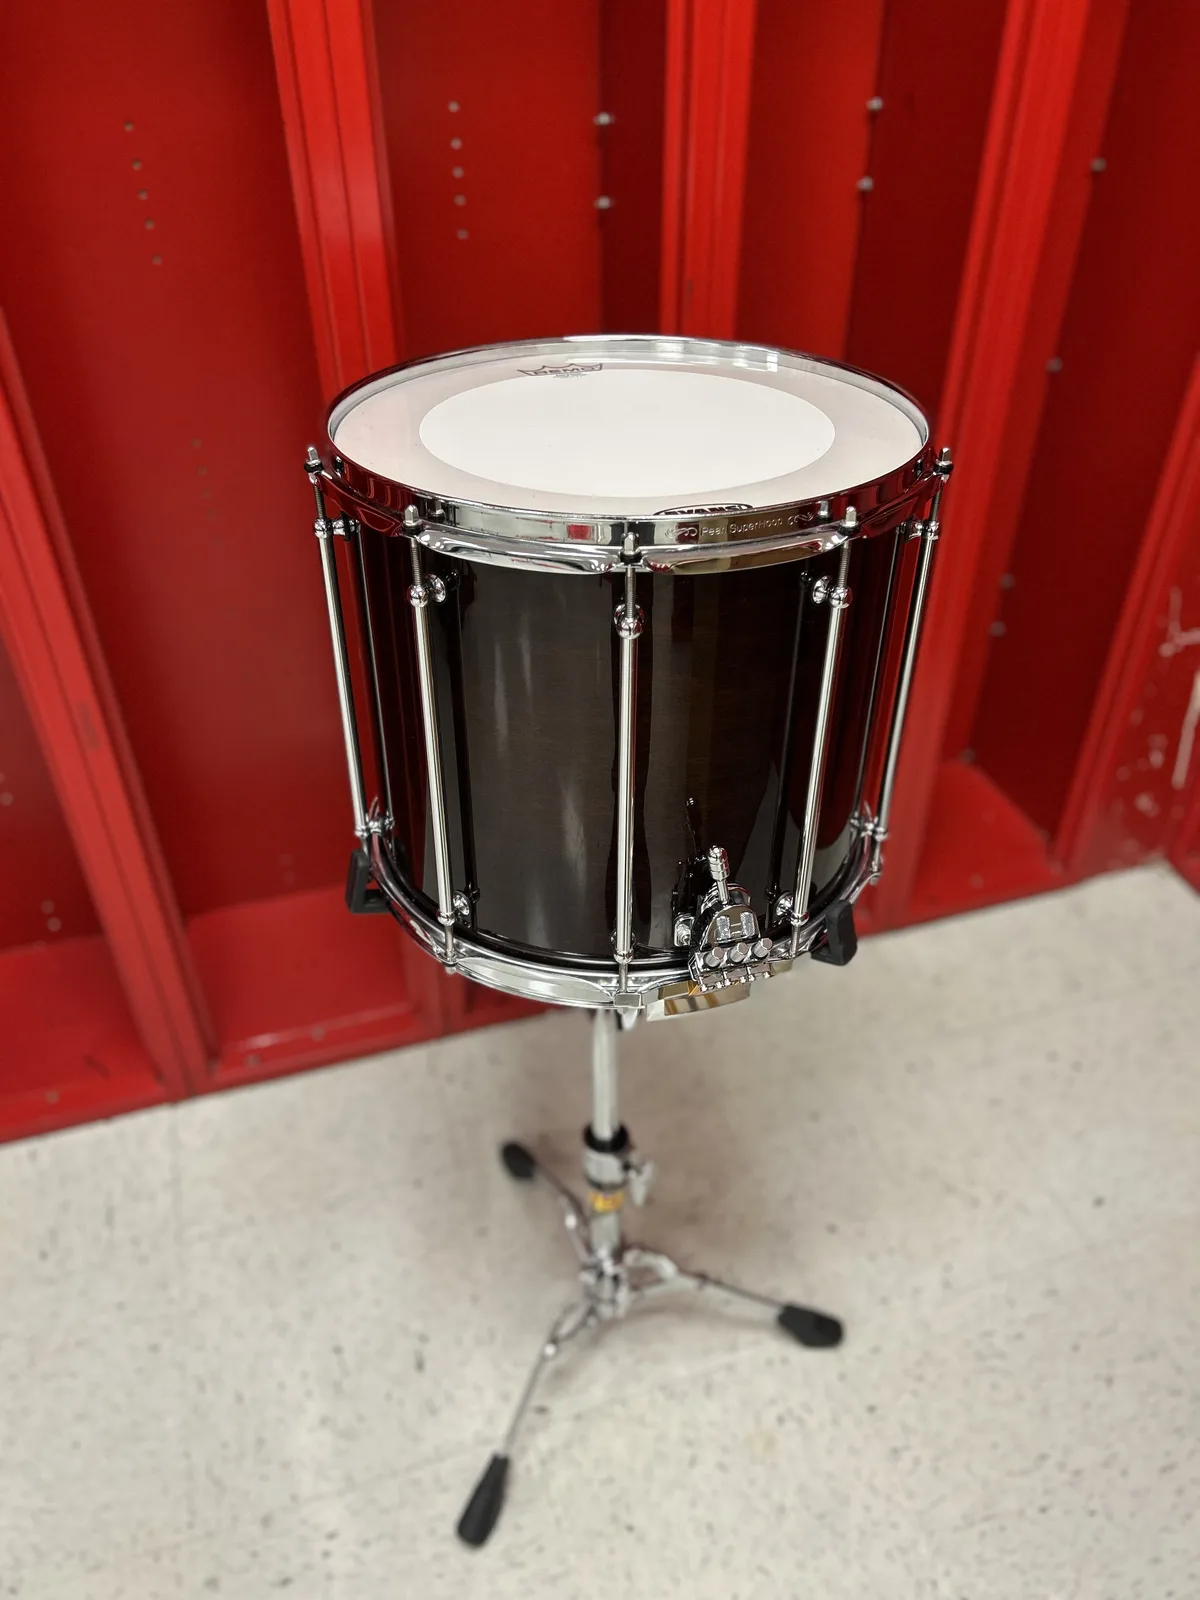
The concert snare is the one drum that can give you problems after you've tuned it. You can spend a ton of time tuning the drum, get it exactly right, and when you turn the snares on, get a crazy buzzing sound as you play it. It's enough to drive you mad. Luckily, the normal fix is to simply tighten the snares until you get a nice crisp sound as you play.
| Snare wire tension | What you hear |
|---|---|
| Too loose | Buzzing, rattling on every hit |
| Too tight | Choked, dead sound |
| Just right | A clean snap, no buzz |
A quick note about tuning any snare drum: make sure you turn the snares off before you start tuning, or you may find it difficult to find the pitch of the head when it's mixed in with the snare sound. You may also find that the resonant head is harder to tune, for two reasons. First, it faces the floor, so you have to play the drum upside down to hear the pitch. Second, if you turn the drum upside down to tune it, the snares are up against the head, and this creates a buzzing sound. I find that the easiest way to tune a resonant head is to take the snares off completely and turn the drum upside down. We've gone deep on the rest of the snare-specific tricks in our full guide to choosing and tuning a concert snare.
Of course, none of this works if the actual drum key has vanished, which in a school band room happens on a schedule that would embarrass NASA. Buy six, and keep one in every mallet bag and one in every percussion cabinet you own. It won't stop them from disappearing (nothing stops that), but it puts the odds back in your favor.
Tuning Marching Drums
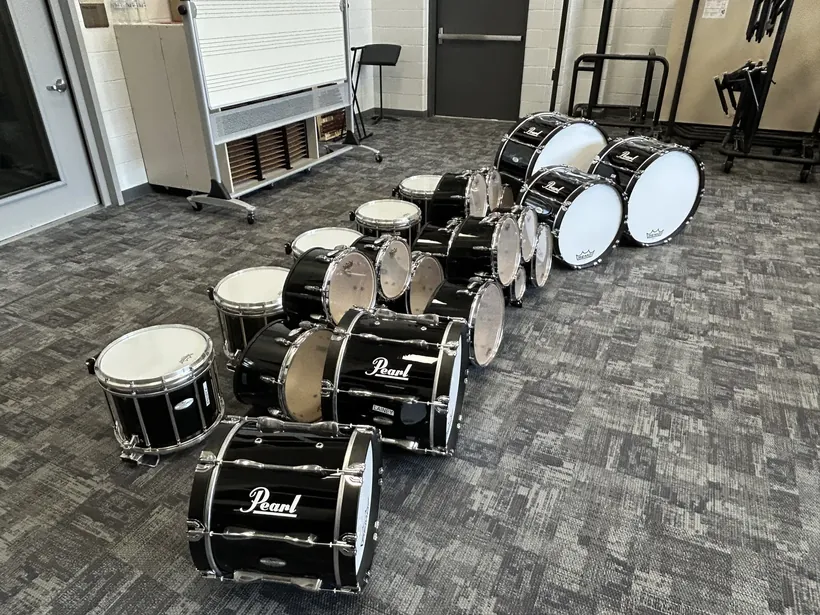
The seat-and-star process from earlier works exactly the same on a marching drum. What changes is how long it stays tuned. A snare or bass drum that sat perfectly in tune in the band room can drift within a single rehearsal once it's outside: heat, humidity, and the drum bouncing against a carrier all put a kind of stress on those tension rods that a concert drum never has to handle. Build a quick tune-up into your pre-rehearsal routine, not just your pre-show one.
| Indoors (concert) | Outdoors (marching) |
|---|---|
| Tuning holds for weeks at a time | Can drift within a single rehearsal |
| Snare tuned for tone | Snare tuned tighter and higher, for cut-through |
| No carrier to fight | Carrier movement adds extra stress on the rods |
Before you touch a single drum, it helps to think about the whole line the way you'd think about voices in a choir: snares sing high, tenors sit in the middle, and basses hold down the bottom. Keeping each section in its own range is what lets you actually hear all three parts at once instead of one blur of drums. That's the real goal behind everything below, not hitting one magic number.
Marching Snares
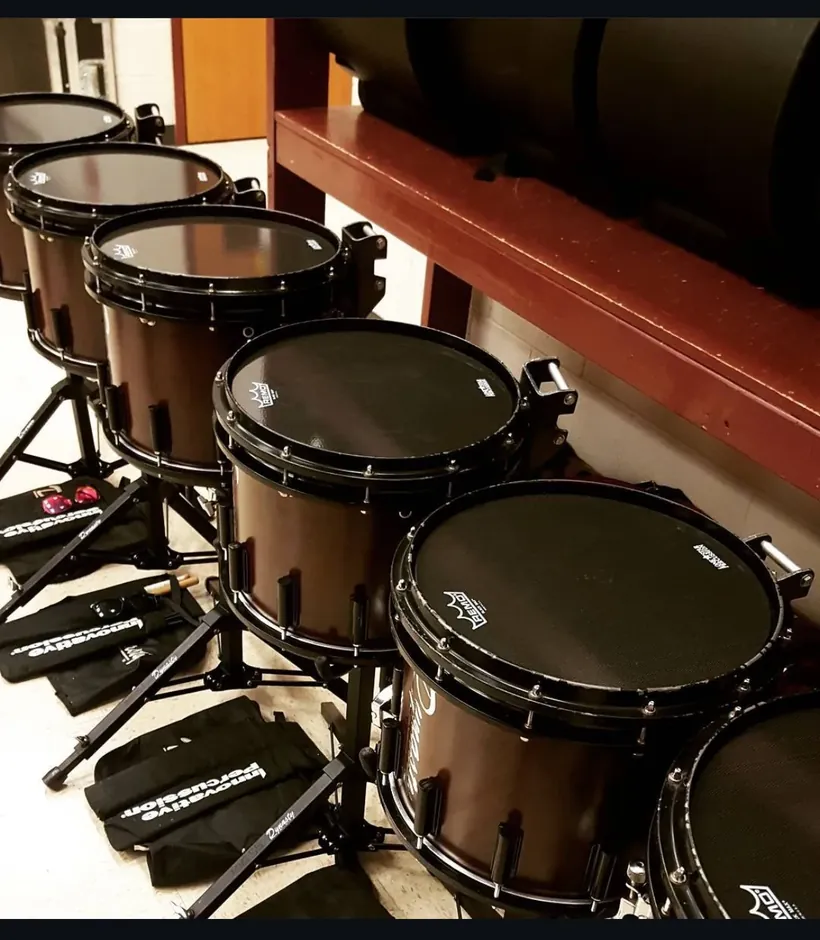
Marching snares are tuned tighter and higher than a concert snare, for the extra attack and projection a drum needs to cut through outdoors. There's no single universal pitch, but a full marching snare batter head typically lands somewhere in the C5 to E5 range depending on the drum's size and head. If snares are already installed while you're tuning the batter head, disengage them and slide something between the snares and the resonant head first; otherwise you'll be fighting snare buzz the whole time instead of hearing the actual pitch.
Marching Tenors (Quads)
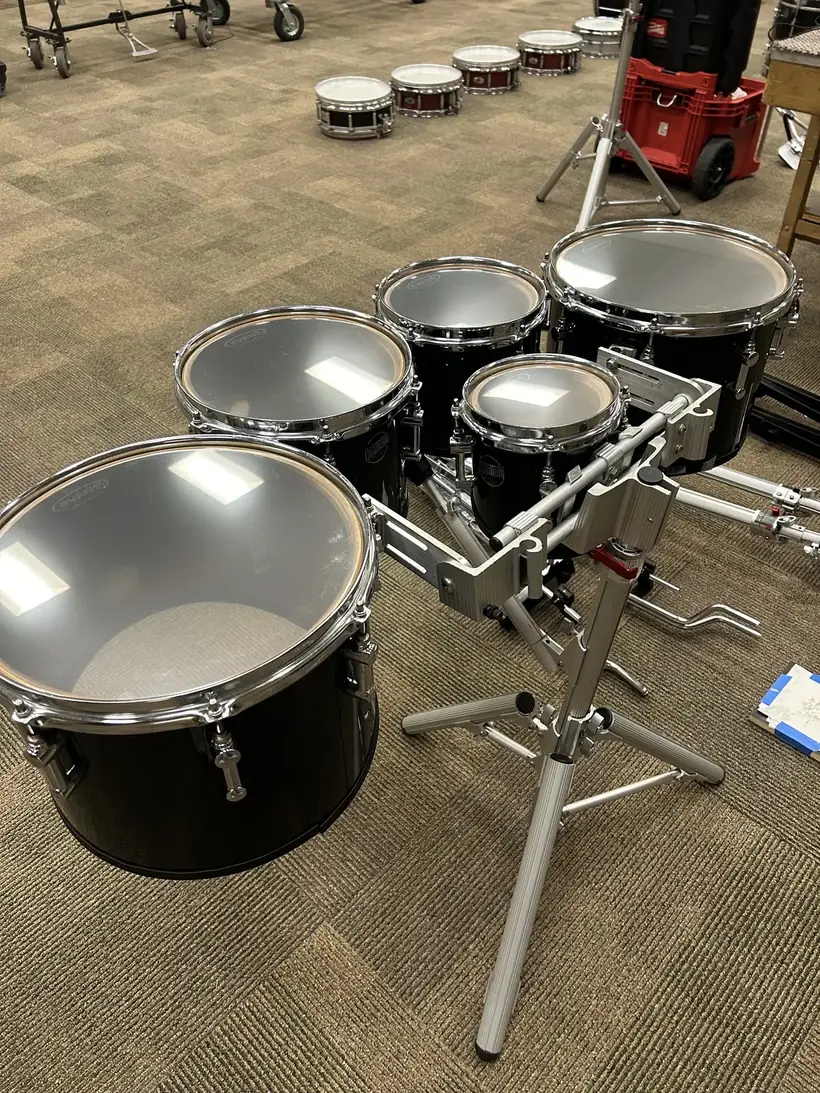
A set of tenors is tuned the same way as a set of concert toms: each drum sits a minor third below the one before it, moving from the smallest, highest drum down to the largest, lowest one. That consistent gap is what makes a run across the set sound like a little melody instead of random thuds. A common approach is to pick one drum as your reference point and tune the rest to sit in tune with it and with each other, rather than chasing an exact note on every drum.
Marching Bass Drums
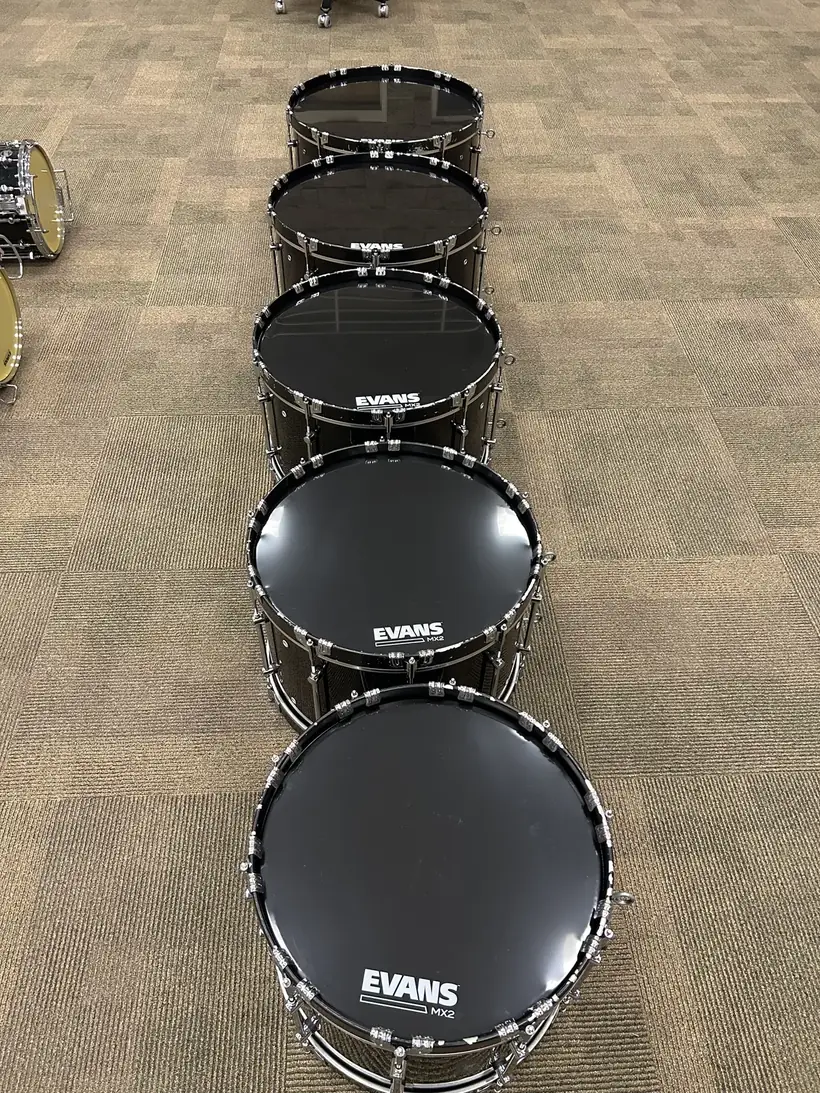
Start with the biggest, lowest drum in the line and work your way up to the smallest, tuning each one on its own before comparing it to its neighbor. There's no fixed pitch to hit here either, but a common five-drum tuning runs D-A-D-F#-A from low to high, with the bottom three spaced a perfect fifth apart for punch and the top two more up to personal taste. Some groups tune the bass line within the key the band is playing in, since it helps everything blend, while others tune slightly outside the key on purpose when they want the bass drums to cut through the horn line more. Aim for a full, resonant tone on the bottom drums without letting the top drums choke out; if the smallest drum sounds strangled, back it off slightly.
Whatever the section, the same rule from earlier still applies: check pitch often and make small adjustments rather than waiting a week and cranking hard. New heads especially need a night to settle before you chase their final pitch, so tune the day before a performance rather than the morning it happens. If a drum sounds dead no matter how you tune it, that's the head talking, not your ears; see the section above on when it's time to replace one instead of fight it.
We handle the drum hardware itself on a marching line, the same way we would on a concert set. See the full marching percussion repair page for what a drumline visit covers.
Tuning Your Drum Set
The drum set is a vital part of your jazz, rock, or pop ensemble, and getting the tuning right for these drums can make them blend right into the genre. One thing to remember about tuning drum sets is that different genres favor different styles of tuning, but we'll go over the basics here, and you can dive deeper if you want to know more. Below is the starting point for a drum set with a bass drum, three toms, and a snare drum. Remember, your ear and the genre decide what the final pitches should be. Pitch ranges converted from the fundamental-frequency chart at drum-tuning.com.
| Drum | Common size | Pitch range | In Hz (for a digital tuner) |
|---|---|---|---|
| Bass drum | 22" | G1-C#2 | 50-70 Hz |
| Floor tom | 16" | C2-G2 | 65-100 Hz |
| Rack tom | 12" | G2-C#3 | 95-140 Hz |
| Rack tom | 13" | F2-B2 | 85-125 Hz |
| Snare drum | 14" | F3-A3 | 175-225 Hz |
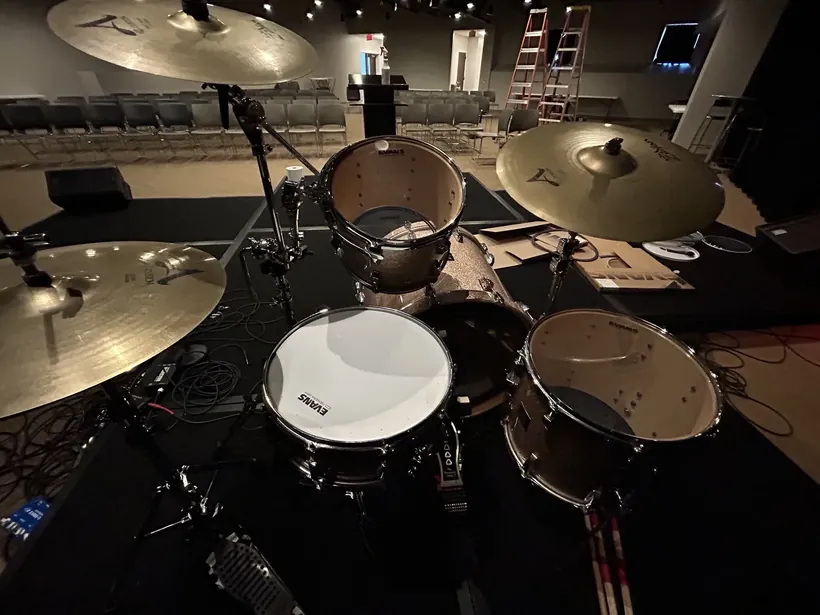
In terms of interval spacing for your drum set, the same theory of tuning in thirds that we use with concert toms works for a drum kit as well. Using a fourth is also acceptable. For how far to spread resonant from batter on each one, see the batter-vs-resonant breakdown above.
A drum-set bass drum is often tuned low and can either be muffled with something like an EMAD setup from Evans, or left open. Rock kits often run a muffled bass drum, while jazz kits often run it open with no muffling at all.
Tuning Congas and Bongos
Hand drums like congas and bongos are tuned differently from anything else in this guide. Most tune with a wrench on lugs around the rim instead of a star pattern, and a natural-skin head shifts pitch with the weather in a way plastic never does. A conga or bongo that was perfect Tuesday can read differently Thursday.
Congas
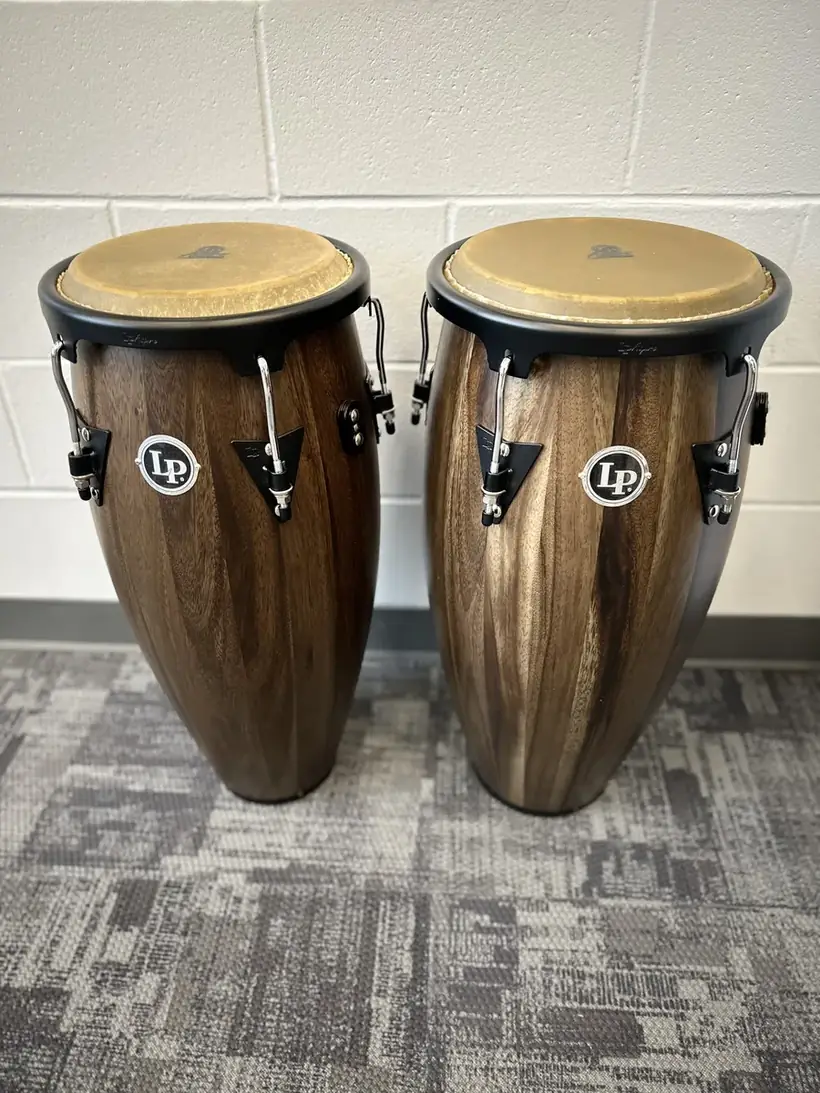
What matters more than any single number is the relationship between drums in a set: a conga and a tumba need to sit apart from each other in pitch the way your toms do.
| Drum | Typical size | Pitch |
|---|---|---|
| Quinto | About 11" | C5-G5 |
| Conga (tres dos) | About 11.75" | A4-E5 |
| Tumba (salidor) | About 12.5" | C4-Bb4 |
| Super tumba | About 14" | A3-G4 |
Most players tune a 4th or 5th apart between drums in the set, using small quarter-to-half turns at each lug rather than big cranks, since a conga usually only has 5 or 6 tension lugs total. CongaChops' conga tuning guide walks through the full process if you want to go deeper, and Remo's own conga drumhead guide is a solid starting reference if yours came with no paperwork at all.
Bongos
Bongos are a pair: the macho is the smaller, higher-pitched drum, and the hembra is the larger, lower one.
| Drum | Typical size | Pitch |
|---|---|---|
| Macho | About 7" | Higher of the pair |
| Hembra | About 8.5" | Lower of the pair |
Exactly how far apart to tune them depends on the player and the style, but a safe starting point is setting the hembra a whole step or more above your highest conga, so the two instruments don't crowd the same range.
Tune the tension rods evenly by working around the head in a circle rather than a star, since bongo heads are small enough that even tension matters more than pattern. Once you're close, strike the head firmly a few times to help it settle, which keeps it from drifting right back out of tune. CongaChops' bongo tuning guide covers the full step-by-step.
If a head's cracked or a rim's bent instead of just out of tune on either instrument, that's hand drum repair territory, not a tuning problem.
What We See When a Drum "Won't Tune"
In the ten years I've been doing this, I've found that if it's taking a long time to get a head in tune, the head is simply worn out and needs to be replaced. Think of an old trampoline that's been jumped on for years: it doesn't spring you back up anymore, it just kind of absorbs you. That's what a worn-out drumhead feels like under a stick. Sun and heat speed the whole thing along too. A new head snaps back like a trampoline; a worn one just soaks up the hit.
| Sounds like a tuning problem | Usually is |
|---|---|
| Buzzing you can't tune away | Snare wires, not the head |
| Won't hold pitch overnight | A stripped tension rod |
| Dead, thuddy tone no matter what | A dented bearing edge |
| One lug always reads flat | A hoop warped from uneven tightening |
It's hard to tell when a drum head is worn out just by playing it. You can't see the issue, and while a trained ear may be able to hear it, you really start to discover that a head is worn when you try to tune it. Tighten a good head against a damaged one, and you can tell the difference.
The good news is that this is exactly what we do every day. On every visit, we take into account everything you've read in this blog post, plus more, so we can get your drums sounding their best. When we do head changes, we check:
- The bearing edge for nicks, dents, or a spot that's gone out of level.
- Bent tension rods that don't put even tension on the hoop.
- The hoop for a warp from a past over-tightening.
- The head itself for a working life that's already over, not just a bad tuning day.
That's the real reason every head change we do starts with checking the edge underneath, not just measuring the size and ordering a replacement. It's why the tuning happens on-site, the same visit, instead of getting handed back as homework.
Every head we install is dialed in
One drum or a whole drumline, we order the right heads ahead of the visit and don't call the job done until it's actually tuned, not just installed. See what a drum head replacement covers, or browse the full repair menu for everything else your section needs.